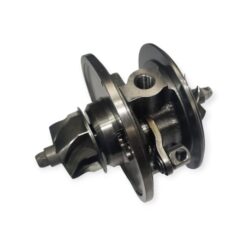
AMT CHRA (Center Housing Rotating Assembly) Compatible with 2006-2011 Volkswagen Golf
$202.09
2006-2011 Volkswagen Golf V/Caddy III/EOS/Jetta V/Passat VI 2.0D / 2006-2011 AUDI A3 2.0D / 2006-2011 Seat Altea/2007-2010 Leon/Toledo III 2.0D / 2006-2011 Skoda Octavia II/2006 Superb II 2.0D CHRA (Center Housing Rotating Assembly) with model number GTB1646MV, compatible with diesel engines, comes with a 6-month limited warranty. This is extended to a 2 year warranty provided a full service history with an RMI-approved MIWA workshop.
Experience the power of performance with AMT Turbochargers. Our turbochargers are engineered with precision by our highly skilled and OE-trained application engineers. With our commitment to affordability, durability, and quality assurance, AMT Turbochargers offer the best original drop-in replacement option on the market. Upgrade your vehicle’s performance and choose AMT Turbochargers for a reliable and powerful driving experience.
Turbo Diesel Components is an authorised master distributor of AMT Turbochargers.
Installing the CHRA (Center Housing Rotating Assembly) or core of a turbocharger is a precise task requiring attention to detail and adherence to proper procedures. Below is a step-by-step guide to ensure a successful installation:
Tools and Materials Needed:
Clean workspace
Basic hand tools (wrenches, screwdrivers, etc.)
Torque wrench
Lubricating oil (preferably turbocharger assembly oil)
Clean lint-free cloths
Thread-locking compound (if specified by the manufacturer)
Protective gloves
Step-by-Step Installation Process
1. Preparation
1. Inspect the Turbocharger Housing:
Clean all components of the turbocharger, including the turbine housing and compressor housing.
Check for cracks, warping, or other damage. Replace any damaged parts before proceeding.
2. Ensure Proper Workspace Hygiene:
Work in a clean environment to prevent contamination.
Use lint-free cloths to clean surfaces.
3. Obtain the Correct CHRA:
Verify that the CHRA matches the specifications of your turbocharger model.
2. Pre-Assembly Checks
1. Verify Orientation:
Determine the correct alignment of the CHRA relative to the turbine and compressor housings.
Pay attention to oil inlet and outlet positions.
2. Lubricate the CHRA:
Prime the oil inlet of the CHRA with turbocharger assembly oil. Rotate the shaft by hand to distribute the oil.
3. Assemble the Turbocharger
1. Install the CHRA into the Turbine Housing:
Position the CHRA carefully into the turbine housing.
Align the locating pins or marks (if present).
2. Secure the Compressor Housing:
Attach the compressor housing to the CHRA using the appropriate fasteners.
Hand-tighten the bolts initially to ensure even alignment.
3. Tighten Fasteners to Torque Specification:
Refer to the turbocharger manufacturer’s manual for specific torque values.
Tighten bolts evenly in a crisscross pattern to prevent misalignment.
4. Reconnect the Actuator (if applicable):
Attach the wastegate or variable vane actuator to its designated position on the housing.
Ensure correct calibration as specified by the manufacturer.
4. Post-Installation
1. Check for Free Movement:
Spin the turbo shaft by hand to ensure it rotates freely without resistance or rubbing.
2. Inspect Seals and Connections:
Double-check all seals, clamps, and connections for proper fit and tightness.
3. Prime the Oil Supply:
Before starting the engine, manually prime the turbocharger oil supply to ensure immediate lubrication.
5. Reinstall the Turbocharger
1. Reconnect to Engine Components:
Reattach the turbocharger to the exhaust manifold, intake piping, and oil/coolant lines.
Ensure all connections are secure and free of leaks.
2. Start the Engine:
Allow the engine to idle for a few minutes to circulate oil through the turbocharger.
Do not rev the engine until the turbo has been properly lubricated.
3. Inspect for Leaks:
Check for oil, exhaust, or air leaks around the turbocharger.
Important Tips
Always follow the specific guidelines provided by the CHRA or turbocharger manufacturer.
Replace all gaskets and seals during installation.
Avoid overtightening fasteners to prevent damage.
Clean or replace the oil feed and drain lines to avoid contamination.
2002-2010 Opel Corsa/Agila/Combo/Tigra 1.3D / Suzuki Ignis/WagonR+ 1.3DDiS CHRA (Center Housing Rotating Assembly) with model number KP35, compatible with diesel engines, comes with a 6-month limited warranty. This is extended to a 2 year warranty provided a full service history with an RMI-approved MIWA workshop.
Experience the power of performance with AMT Turbochargers. Our turbochargers are engineered with precision by our highly skilled and OE-trained application engineers. With our commitment to affordability, durability, and quality assurance, AMT Turbochargers offer the best original drop-in replacement option on the market. Upgrade your vehicle’s performance and choose AMT Turbochargers for a reliable and powerful driving experience.
Installation Instructions:
Installing the CHRA (Center Housing Rotating Assembly) or core of a turbocharger is a precise task requiring attention to detail and adherence to proper procedures. Below is a step-by-step guide to ensure a successful installation:
Tools and Materials Needed:
Clean workspace
Basic hand tools (wrenches, screwdrivers, etc.)
Torque wrench
Lubricating oil (preferably turbocharger assembly oil)
Clean lint-free cloths
Thread-locking compound (if specified by the manufacturer)
Protective gloves
Step-by-Step Installation Process
1. Preparation
1. Inspect the Turbocharger Housing:
Clean all components of the turbocharger, including the turbine housing and compressor housing.
Check for cracks, warping, or other damage. Replace any damaged parts before proceeding.
2. Ensure Proper Workspace Hygiene:
Work in a clean environment to prevent contamination.
Use lint-free cloths to clean surfaces.
3. Obtain the Correct CHRA:
Verify that the CHRA matches the specifications of your turbocharger model.
2. Pre-Assembly Checks
1. Verify Orientation:
Determine the correct alignment of the CHRA relative to the turbine and compressor housings.
Pay attention to oil inlet and outlet positions.
2. Lubricate the CHRA:
Prime the oil inlet of the CHRA with turbocharger assembly oil. Rotate the shaft by hand to distribute the oil.
3. Assemble the Turbocharger
1. Install the CHRA into the Turbine Housing:
Position the CHRA carefully into the turbine housing.
Align the locating pins or marks (if present).
2. Secure the Compressor Housing:
Attach the compressor housing to the CHRA using the appropriate fasteners.
Hand-tighten the bolts initially to ensure even alignment.
3. Tighten Fasteners to Torque Specification:
Refer to the turbocharger manufacturer’s manual for specific torque values.
Tighten bolts evenly in a crisscross pattern to prevent misalignment.
4. Reconnect the Actuator (if applicable):
Attach the wastegate or variable vane actuator to its designated position on the housing.
Ensure correct calibration as specified by the manufacturer.
4. Post-Installation
1. Check for Free Movement:
Spin the turbo shaft by hand to ensure it rotates freely without resistance or rubbing.
2. Inspect Seals and Connections:
Double-check all seals, clamps, and connections for proper fit and tightness.
3. Prime the Oil Supply:
Before starting the engine, manually prime the turbocharger oil supply to ensure immediate lubrication.
5. Reinstall the Turbocharger
1. Reconnect to Engine Components:
Reattach the turbocharger to the exhaust manifold, intake piping, and oil/coolant lines.
Ensure all connections are secure and free of leaks.
2. Start the Engine:
Allow the engine to idle for a few minutes to circulate oil through the turbocharger.
Do not rev the engine until the turbo has been properly lubricated.
3. Inspect for Leaks:
Check for oil, exhaust, or air leaks around the turbocharger.
Important Tips
Always follow the specific guidelines provided by the CHRA or turbocharger manufacturer.
Replace all gaskets and seals during installation.
Avoid overtightening fasteners to prevent damage.
Clean or replace the oil feed and drain lines to avoid contamination.
What’s in the box
1 x AMT CHRA (Center Housing Rotating Assembly) compatible with 2006-2011 Volkswagen Golf V/Caddy III/EOS/Jetta V/Passat VI 2.0D / 2006-2011 AUDI A3 2.0D / 2006-2011 Seat Altea/2007-2010 Leon/Toledo III 2.0D / 2006-2011 Skoda Octavia II/2006 Superb II 2.0D
Only logged in customers who have purchased this product may leave a review.
Related products
Offroad, Performance & 4x4
Braided Hose Stainless Steel For Oil Use Only ID 8.1, OD 10.9. Plastic
Offroad, Performance & 4x4
Turbo Downpipe Adapter Flange 3 bolt 2.5″ to 2.5″ V Band Adapter for GT28
Offroad, Performance & 4x4
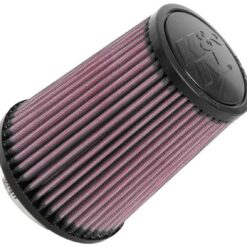
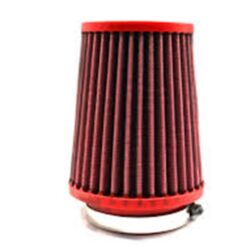
K&N Universal Air Filter Cone Filter 70mm 150 Height Washable RU-9310
Offroad, Performance & 4x4
Nissan Navara Double Cab 2015-2020 Weather Guards Compression Gloss Black
Offroad, Performance & 4x4
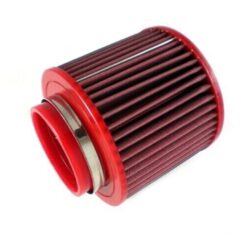
BMC Air filter sa80-110 Reusable Washable Filter 80mm Universal
Offroad, Performance & 4x4
Offroad, Performance & 4x4
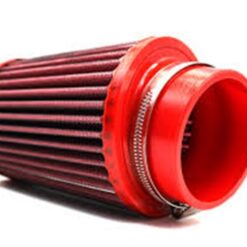
BMC Air filter sa70-128 Reusable Washable Filter 70mm Universal
Offroad, Performance & 4x4
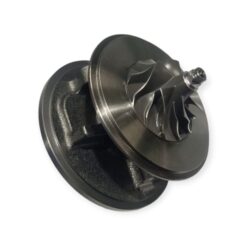
Golf 5 / Polo 1.9tdi BLT Asz BTB 2004-2007 Bv39 0238253010 Turbo Core





Reviews
There are no reviews yet.